Sea Raider Owner’s Manual
Plate aluminium boats, 6.25 m to 10 m — operation, care and maintenance
Sea Raider Pty Ltd | ABN 45 683 471 963 | Redlands Coast Marina, Queensland, Australia | 07 3477 9338 | [email protected] | Version 1.1 | Issued September 2026
Contents
- Read this first
- Your boat
- Warnings and how to read this manual
- Your Australian Builders Plate
- Flotation and stability
- Safety equipment and lifejackets
- Licence and registration
- Before you leave
- Fuel and fuelling
- Engine, controls and steering
- Electrical system
- On the water
- Launching and retrieving
- Trailer and towing
- After every trip
- Caring for the hull and finish
- Deck and fit-out
- Storage and lay-up
- Maintenance schedule
- Troubleshooting
- Modifications and accessories
- Commercial use
- Your warranty and how to claim
- Specifications by model
- Service record
- Glossary
Read this first
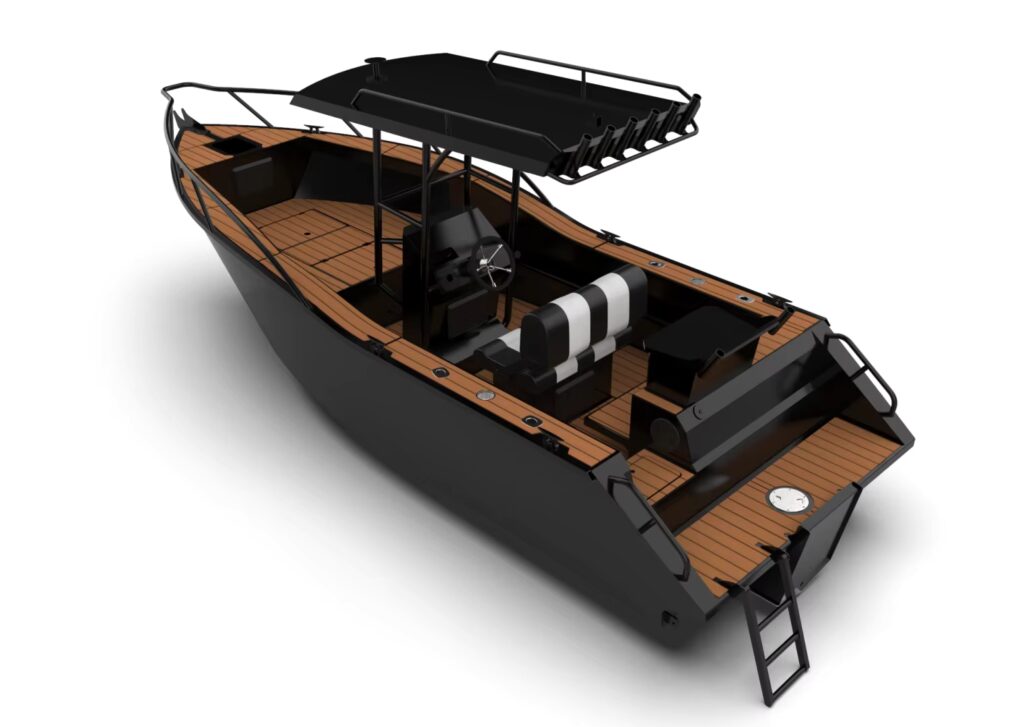
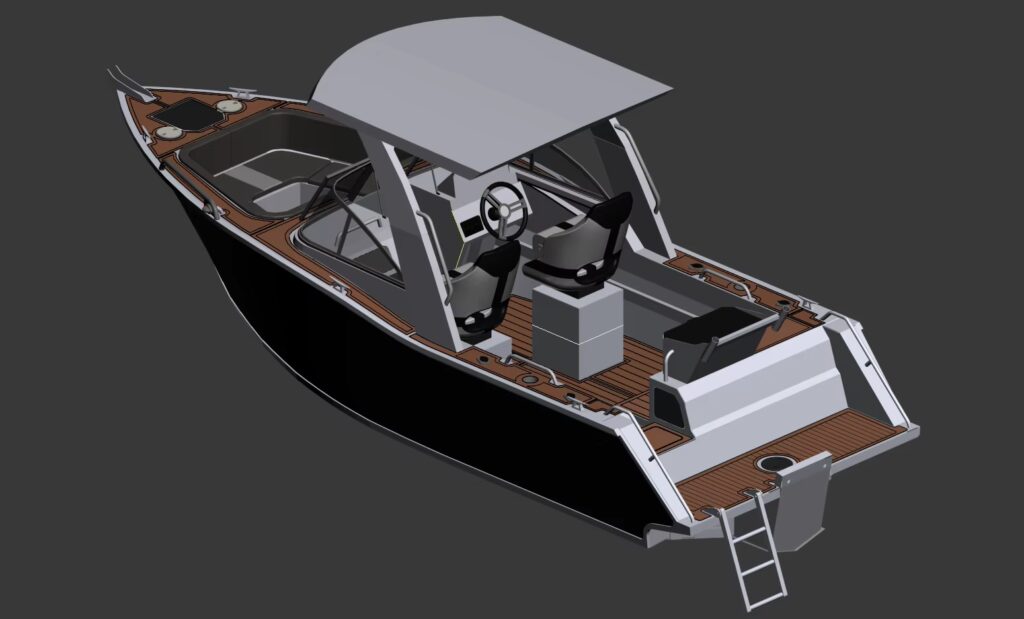
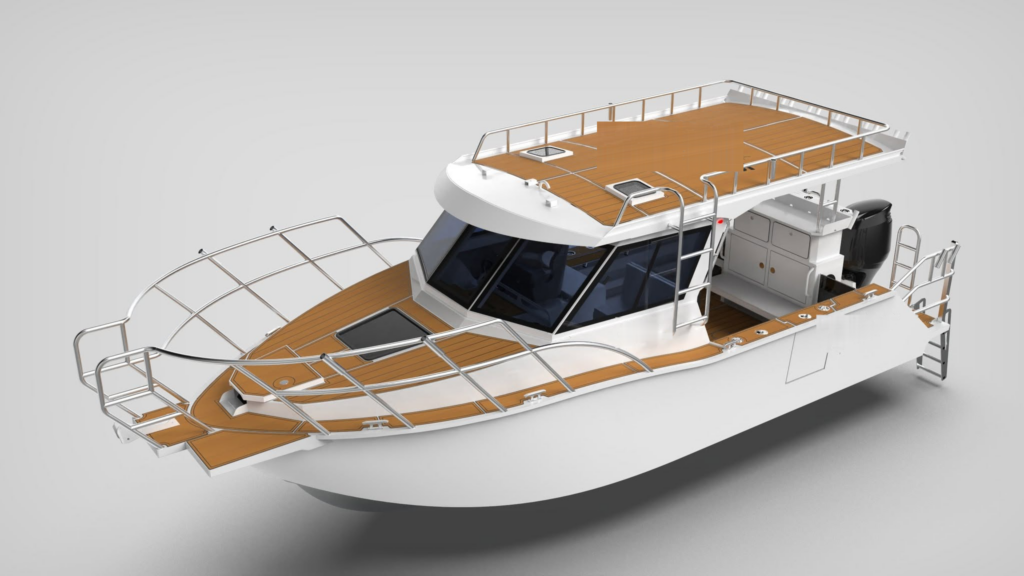
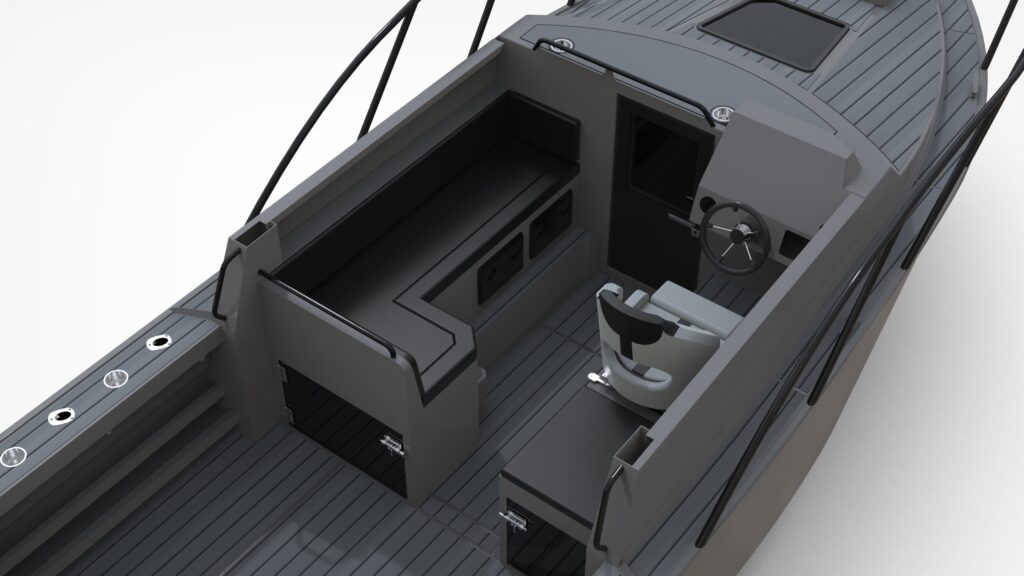
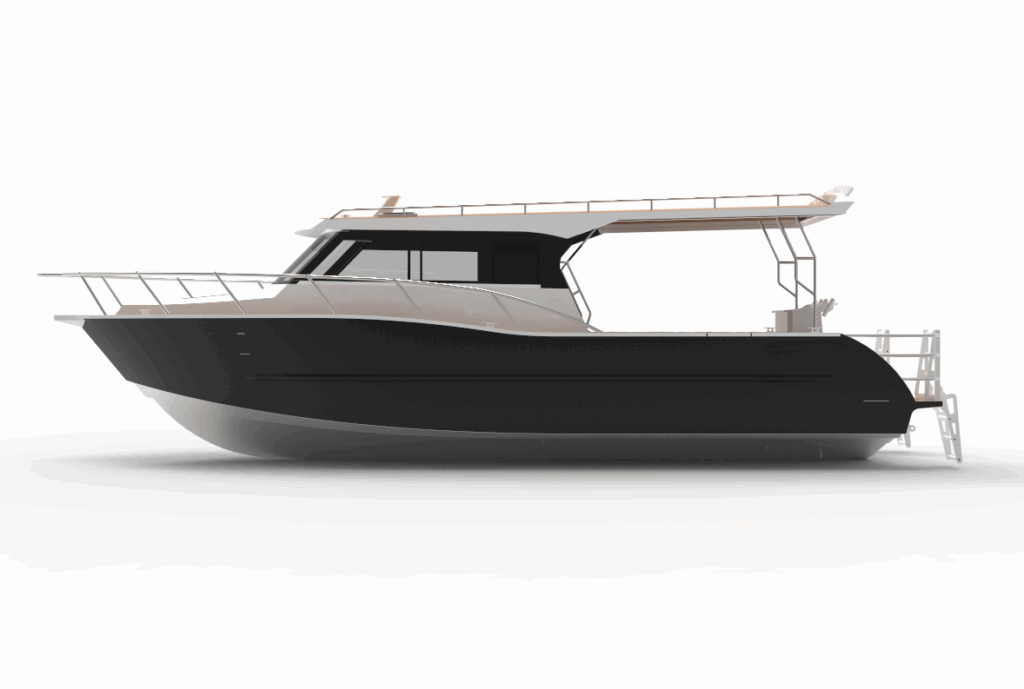
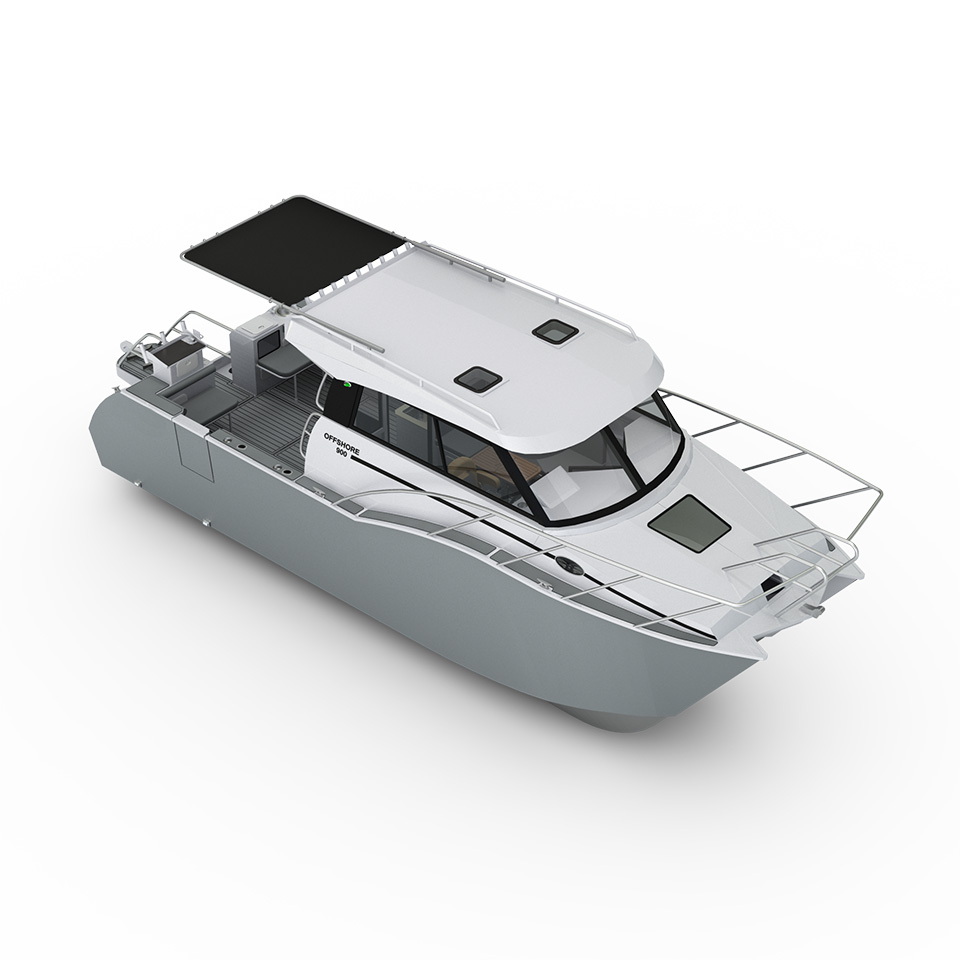
This manual covers every production boat in the Sea Raider range: the 6.25 m, 6.85 m and 7.5 m hulls in their Centre Console, Pro Fisher, SportsCab, BowRider and Walk Around layouts, the Boss 770 and Boss 880, the 9.6 m Pro Fisher, and the 7.9 m, 8.8 m and 10 m Shark Cats. Where something differs by model it is called out. Where something depends on the engine, trailer or electronics fitted to your boat, this manual tells you which document governs and defers to it.
Three documents work together, and it is worth knowing which is which:
- Your Sea Raider warranty (www.searaider.com.au/warranty) is the contract. It sets out what is covered, for how long, and what is excluded.
- The Standard Terms and Conditions of Sale are the agreement you signed when you ordered. Clause 14 is your obligations as an owner; clause 15 is the warranty in summary.
- This manual is how you meet those obligations. Several warranty exclusions refer to it by name. The sections marked Warranty condition are the ones a claim will be measured against; the rest is guidance from people who spend their lives around these boats.
Keep the printed copy with the boat’s papers. The current version is always at www.searaider.com.au/owners-manual, and if the two differ, the web version is the one in force.
The short version — ten things that keep your warranty and keep you safe
1. Wash the whole boat, inside and out, with fresh water after every trip. Wipe it dry.
2. Flush the engine after every trip, following the engine manual.
3. Keep the trailer bearings full of grease. Top them up after every launch and before every long tow.
4. Bungs out and bow up when the boat is on the trailer. Battery isolator off.
5. Never exceed the persons, load or engine figures on your Australian Builders Plate.
6. Never put copper-based antifouling, copper or brass fittings, or lead sinkers against the hull.
7. Never use acids, alkalis, bleach or solvents on the boat.
8. Have the engine serviced at 20 hours and then every 100 hours or 12 months. Keep the receipts.
9. Do not drill, weld or wire anything into the boat without asking us first.
10. If something breaks, stop using it and tell us in writing.
Your boat
Fill this page in at handover with your dealer, and update it if anything changes. In a warranty claim, an insurance claim, or a call to us for help, these are the numbers we will ask for first.
Model and layout: ________________________________________
Hull Identification Number (HIN): ________________________________________
Date of original retail purchase: ________________________________________
Supplying dealer: ________________________________________
Boat registration number and state: ________________________________________
Engine make, model and horsepower: ________________________________________
Engine serial number: ________________________________________
Engine warranty registered on (date): ________________________________________
Trailer make and model: ________________________________________
Trailer VIN: ________________________________________
Trailer plate: ATM (kg) / GTM (kg) / Tare (kg): ________________________________________
Trailer wheel bearing and seal sizes (from the trailer invoice): ________________________________________
Trailer registration number: ________________________________________
Handover checklist signed (date): ________________________________________
Handed over by (dealer) / Received by (owner): ________________________________________
Photograph your Australian Builders Plate and your trailer compliance plate and keep the photos with this page.
Warnings and how to read this manual
Instructions are marked in four ways.
- DANGER — you or someone else will be seriously hurt or killed if you ignore this.
- WARNING — you or someone else may be seriously hurt, or the boat may be badly damaged.
- CAUTION — the boat or equipment will be damaged.
- Warranty condition — this is one of the owner obligations in clause 14 of the Terms and Conditions, or an exclusion in the warranty. Failing to do it can void a claim.
A boat is not a car. It has no brakes, it responds to wind and tide as well as the throttle, and the water it sits in is trying to corrode it. The habits in this manual are not fussiness — they are the difference between a hull that lasts thirty years and one that does not.
DANGER — Alcohol, drugs and boats do not mix. The skipper is legally responsible for every person on board, for the safety equipment, and for obeying the rules of the water. Queensland applies a blood alcohol limit of 0.05 to the person in charge of a boat under way.
Your Australian Builders Plate
Every Sea Raider is delivered with an Australian Builders Plate (ABP). It is fitted where the skipper can see it, and it is the single most important label on the boat. Find it now.
The plate states, for your specific hull:
- Number of persons — the maximum number of people, and their total mass, the boat is designed to carry.
- Maximum load — the total mass of everything on board: people, engine, fuel, batteries, gear, and any accessories fitted after delivery. The engine counts against this figure.
- Maximum outboard power and mass — the largest engine, in kilowatts and kilograms, the transom and hull are rated for.
- Buoyancy statement — on boats under six metres, whether the hull has basic or level flotation.
- The standard the figures were calculated to, and two warnings that are printed on every plate.
The figures are calculated for protected waters — lakes, rivers, bays and estuaries. The plate itself tells you to reduce persons and load in bad weather or in open water, and refers you to this manual. Our advice, in line with Queensland guidance: in open water or a deteriorating forecast, carry around one third fewer people than the plate allows, and keep weight low and central.
Alterations invalidate the plate. Changing the hull, adding structure, fitting a heavier engine, adding an auxiliary or electric motor, a bow-mount trolling motor, a second battery bank, a fridge, a tower or a hardtop all change the numbers. The plate warns you of this, and so do we: see Modifications and accessories.
- Warranty condition: operating the boat outside the figures on its Australian Builders Plate — persons, load, or engine power and mass — is overloading, and damage caused by it is excluded from warranty.
Flotation and stability
Every Sea Raider hull is foam filled and sealed water tight for positive buoyancy. That sits alongside the self-draining deck with its no-return scuppers, and the separate underfloor bilge pump — three independent ways of dealing with water. If the boat is swamped, it floats.
Understand what that does and does not mean:
- Basic flotation keeps the swamped boat afloat, but not necessarily upright or level. Level flotation keeps the swamped boat upright and roughly level in calm water. Your plate tells you which applies to boats under six metres. Neither makes the boat self-righting.
- If the boat is swamped or capsized, stay with the boat. It is far easier to see than a person in the water, and it will keep you afloat. Do not try to swim for shore.
- Flotation is designed around the plate figures. An overloaded boat has less freeboard, takes water sooner, and has less reserve buoyancy when it does.
What compromises the foam. Closed-cell foam is inside sealed chambers. It cannot be drained or dried once wet, so the rules are about keeping water out in the first place: never drill into the floor, deck or a sealed chamber without sealing the penetration; never let petrol or oil pool on the floor (petroleum products attack foam — if you spill fuel inside the boat, tell us before your next trip); keep the scuppers and deck drains clear so water leaves the way it is meant to. A boat that starts sitting lower, feels heavier to tow, or sounds dull when you tap the hull has taken on water somewhere and needs to be looked at.
Safety equipment and lifejackets
This is the law, not our opinion. The list below is Queensland’s, taken from the Transport Operations (Marine Safety) Regulation 2016 as in force in September 2026. Requirements change — Queensland’s lifejacket rules changed in 2024 and 2025 — so check Maritime Safety Queensland before each season, and if you boat in another state, check that state’s authority. The rules in New South Wales, Victoria, Tasmania, South Australia, Western Australia and the Northern Territory all differ, some materially.
Queensland — what you must carry
| Where you are | What you must carry |
|---|---|
| Smooth waters (lakes, rivers, and within 0.5 nm of land inside partially smooth limits) | A compliant lifejacket for every person aged one year and over. On a boat over 5 m, firefighting equipment capable of putting out a fire on the boat quickly. |
| Partially smooth waters and beyond | Everything above, plus a V sheet, two compliant hand-held red flares and two compliant hand-held orange smoke signals — all in date. |
| More than 2 nautical miles from land | Everything above, plus a 406 MHz EPIRB, registered with AMSA and the registration kept current. |
| Sunset to sunrise | Navigation lights, plus a torch or other signalling light. |
You should also carry, on every trip: an anchor with rope and chain sized for the boat; a bailer or working bilge pump; a paddle or oars on smaller boats; drinking water; a first aid kit; a basic tool kit and spares; a marine radio or, at minimum, a charged phone in a waterproof bag. Sea Raider’s safety gear pack is available with any build.
Queensland — lifejacket type and when to wear one
- Smooth waters: Level 50, 50S or 100. Partially smooth: Level 50 or 100. Beyond partially smooth waters: Level 100. Lifejackets must comply with AS 4758.
- Lifejackets must be worn by: everyone aged one to under twelve in an open area of a boat under way; everyone on an open boat under 4.8 m at night, or by day when only one person aged twelve or over is aboard; and everyone in an open area of any boat while crossing a designated coastal bar.
- Lifejackets must be in plain sight or stowed in a place marked with a red-on-white LIFEJACKETS sign.
- The skipper must tell every person on board where the safety equipment is before setting out — by showing them, telling them or pointing to the sign.
- Flares, EPIRBs, inflatable lifejackets and extinguishers must be in date and serviced to the manufacturer’s schedule. Check the dates before every trip, not once a year.
Licence and registration
- Boat registration. In Queensland any boat with an engine of 3 kW or more must be registered before it goes on the water. Registration numbers go on both sides of the hull, at least 150 mm high on a planing hull, in a contrasting colour, readable at 30 m. A transfer of ownership must be lodged within 14 days. Queensland packages from Sea Raider include boat and trailer registration; interstate buyers register in their home state.
- Licence. Queensland requires a recreational marine driver licence to operate a boat with an engine over 4.5 kW (about 6 hp). Every Sea Raider needs one. Other states have their own thresholds and their own licences; a Queensland licence is generally recognised interstate, but check before you travel.
- Trailer registration. Trailers are registered separately. Trailers over 750 kg ATM need a safety certificate when sold or transferred in Queensland. See Trailer and towing.
- Commercial use changes everything: see Commercial use.
Before you leave
Run through this every time. It takes five minutes at home and saves the day at the ramp.
Planning
- Get the forecast from the Bureau of Meteorology, and if you are crossing a bar or going offshore, get the bar and swell conditions too. Winds under 10 knots are pleasant; 10 to 15 knots is comfortable in a Sea Raider driven sensibly; over 20 knots is demanding and a Strong Wind Warning (26 knots and above) is a reason to stay home. The fish will still be there next weekend.
- Plan the trip, the anchorages and the time back. Tell someone ashore where you are going and when you will be back, and log on with your local Volunteer Marine Rescue or Coast Guard.
- Fuel: use the one-third rule — a third out, a third back, a third in reserve. Fill up before the ramp, not after.
The boat
- Bungs in. Check them twice. It is the most common and most avoidable way to sink a boat at the ramp.
- Battery isolator on; batteries fully charged; navigation lights and bilge pump tested — lift the float switch by hand and listen for the pump.
- Engine: oil level, tell-tale ready to check on start-up, propeller nut and split pin secure, primer bulb firm, kill-cord attached to the skipper. Check the fuel filter and water-separator bowl for water.
- Safety gear on board, in date, and every passenger shown where it is. Children under twelve in lifejackets before you leave the ramp.
- Loose gear stowed, hatches latched, canopy secured, anchor secured.
- Steering: lock to lock, no stiffness. Throttle and gear: neutral, forward, reverse.
The trailer
See Trailer and towing for the full pre-tow check. The short form: coupling latched and pinned, safety chains crossed and shackled, winch strap tight plus the separate bow safety chain, stern tie-downs on, engine support fitted, tyres at pressure, lights working, bearings greased.
Fuel and fuelling
Your boat has an underfloor aluminium fuel tank: 170 L to 175 L on the 6.25 m hulls, 300 L to 350 L on the 6.85 m and 7.5 m, 380 L to 1,000 L on the Boss and Shark Cat range, and 900 L on the 9.6 m Pro Fisher. Your exact capacity is in the specification table at the back of this manual.
- Fuel. Use the grade your engine manual specifies. All current outboards sold in Australia will run on E10, but the industry advice — and ours — is to avoid ethanol blends: use 95 RON premium unleaded rather than E10 where standard unleaded is unavailable, and never use a blend above E10. Ethanol absorbs water, separates from the petrol in as little as two weeks in a humid climate, and the water layer ends up at the pick-up. Buy fuel from a busy servo and use it within 90 days.
- Fuelling. Engine off, everyone out of the boat, no smoking, no phones. Fill slowly and do not overfill — leave room for expansion in the sun. Wipe any spill immediately. Petrol on the deck attacks the flotation foam and EVA decking, and petrol vapour in a bilge is an explosion waiting for a spark: after fuelling, open hatches and let the boat air before starting.
- The water separator. Your fuel system has a water-separating filter. Check the bowl before every trip and drain any water. Replace the element every 100 hours or annually — sooner if you find water. Carry a spare element on long trips.
- Storage. If the boat will sit for more than a couple of weeks, keep the tank as full as practical to reduce condensation, and add a fuel stabiliser for anything over a month. See Storage and lay-up.
- The tank itself. Aluminium tanks corrode from the outside, where water is trapped against them. Keep the underfloor area drained and free of debris; check the deck filler cap seal and the breather for cracks; never let anything wet sit against the tank. At each annual service, the underfloor space should be inspected.
DANGER — Never carry petrol in an unapproved container, never fuel a running engine, and never fuel with passengers aboard.
Engine, controls and steering
Your engine is a Suzuki, Mercury or Yamaha, fitted and water tested by us. The engine manufacturer’s owner’s manual governs everything about the engine — starting, break-in, service intervals, flushing, storage, fuel and oil. Where this manual and the engine manual differ, follow the engine manual. Register the engine warranty with the manufacturer within the time they specify; the six-year outboard warranty offered with Sea Raider packages is the engine manufacturer’s, on their terms.
Running in
Every new outboard needs a break-in period — about ten hours across all three brands. The pattern is the same: a warm-up idle, no more than half throttle for the first couple of hours, then progressively more, varying the revs constantly and never holding full throttle for more than a few minutes. Do not troll at one speed for the whole first hour, and do not lug the engine at low revs under heavy load. Your engine manual gives the exact schedule.
First service and ongoing service
- First service at 20 hours or three months, whichever comes first (10 hours on some Suzuki models — check your manual). Engine oil and filter, gear oil, and a full inspection.
- Every 100 hours or 12 months, whichever comes first, from then on. This is the interval we require for the warranty on the boat, matching the interval every major engine maker specifies.
- Heavy use — frequent salt water, a lot of trolling, long runs at full throttle — shortens the intervals.
- Keep every receipt. A warranty claim on the boat, or on the engine, will ask for the service history.
Flushing — every trip, without exception
Salt left inside the cooling passages corrodes the engine from the inside. Flush after every trip in salt, brackish or dirty water, as soon as you are home.
- Most current outboards have a flush port: engine off, hose on, run fresh water for the time the manual specifies (five to fifteen minutes depending on the brand). The engine must be vertical.
- If you use flushing muffs instead: engine running at idle, in neutral, for the specified time, watching the tell-tale. Never rev it, never run it without water, and keep everyone clear of the propeller.
- Afterwards, lower the engine to vertical so the passages drain. Rinse the cowl only when vertical — tilted, water runs into the air intake. Then spray the powerhead, electrical connectors and trim rams with a marine corrosion inhibitor.
Propeller, gearcase and trim
- After every trip, check the propeller hub for fishing line. Line cuts the prop-shaft seal, water gets into the gear oil, and the gearbox fails. Pull the prop every few months, clear any line and grease the shaft.
- Milky gear oil means water is getting in. Do not run the engine until it is investigated.
- A weak, hot or missing tell-tale stream means the engine is not cooling. Stop and investigate — overheating damage is rapid and expensive.
- Grease the trim and tilt pivots, cycle the trim through its full range regularly, and keep the trim rams rinsed and sprayed: they corrode on trailered salt-water boats.
- The engine’s own sacrificial anodes — on the gearcase, the anti-ventilation plate, the trim rams and inside the powerhead — must be inspected monthly and replaced at half worn. Use the manufacturer’s aluminium anode kit and never paint an anode.
Controls and steering
- Attach the kill-cord to the skipper every time the engine is running. It is the reason a skipper who goes overboard is not run down by their own boat.
- Hydraulic steering: check the reservoir level and look for weeping at the helm and the cylinder at each service. Any stiffness or play in the steering is a stop-and-check item, not a live-with-it item.
- Twin-engine boats (Shark Cats, and Boss, 7.5 m and larger monohulls where fitted): steer with the throttles in close quarters — one ahead, one astern will turn the boat on the spot. If one engine fails, the other will get you home; that is why they are there.
Electrical system
Your boat is wired with marine-grade tinned wire, sealed terminations, and a battery isolator switch. Batteries are not part of the standard build unless listed in your order.
- The isolator switch is not decoration. Turn it off whenever the boat is not in use. An aluminium hull with a live electrical system and a small current leak to the bilge will corrode — fast. This is the single most effective thing you can do against electrolysis on a trailered boat.
- Batteries. Use marine batteries — flooded, AGM or lithium — sized and charged as your dealer set up. Keep terminals clean, tight and coated. Check electrolyte levels on flooded batteries. If the boat sits for more than two weeks, use a marine multi-stage maintenance charger. Never use an automotive battery charger aboard an aluminium boat.
- Lithium batteries must not be connected to an outboard’s charging circuit directly; they need a DC-to-DC charger and a battery management system, installed to AS/NZS 3004.2. Ask us before fitting one.
- Shore power (240 V). Any 240 V installation — shore-power inlet, inverter, charger wiring — must be done by a licensed electrician to AS/NZS 3004.2. If the boat is ever left connected to shore power at a marina, a galvanic isolator is the minimum protection; an isolation transformer is better. Stray current from a marina can eat a propeller in days.
- Bilge pump. The automatic bilge circuit is wired direct to the battery through its own fuse, so it works with the isolator off. Test the float switch by hand before every trip and flood-test it with a bucket of fresh water every three months. Keep the bilge clear of anything that could jam the float.
- Adding electronics. Sounders, plotters, lights, winches, fridges and stereos are all routine — and all a warranty risk if fitted badly. Every addition must use marine-grade wire, sealed terminations, its own fuse or breaker, and no penetration of the hull or a sealed chamber without a sealed fitting. Have us or your dealer fit them, or use a qualified marine electrician and keep the invoice. Automotive-style additions are the commonest cause of stray-current corrosion we see.
- Bonding. Underwater metal on the boat is bonded to the hull anodes. Do not disconnect a bonding wire, and do not add an isolated metal fitting below the waterline.
On the water
Loading and trim
- Load within the plate, low and central. If the boat leans at rest, move gear or people until it sits level — a boat that lists at the dock will list under way and be wet on one side.
- Keep the walkways and gunwales clear. Nobody rides the bow, the gunwale or the transom while the boat is under way.
- Trim tabs (Lenco, or Zipwake where fitted) correct list and hold the bow down. Use short bursts and wait for the boat to respond. Tabs down to get onto the plane with a load aboard and to keep the bow down in a head sea. To lift the port bow, lower the starboard tab. Fully retract the tabs in a following sea, when running a bar, and before going astern.
Sea conditions
- A double chine plate hull throws spray down and out and lands softly, but no hull is immune to being driven too hard. Match your speed to the sea. If the boat is slamming, slow down; if it is stuffing the bow in a following sea, trim up and slow down.
- Following seas are where boats get into trouble. Keep the tabs up, the engine trimmed up slightly, and the speed matched to the waves so you are not running down the face of one into the back of the next.
- Crossing a bar. Everyone in an open area wears a lifejacket — that is the law. Get the bar report before you leave, log on with VMR or the Coast Guard, cross on the incoming tide where you can, watch the sets before committing, and once committed keep the power on — never stop or turn beam-on in the break. If in doubt, do not cross. Maritime Safety Queensland publishes a bar-crossing guide; read it before your first bar.
Anchoring
- Use an anchor and rode sized for your boat: at least 2 m of chain with nylon rope on the smaller hulls, more on the larger. Danforth or plough for sand and mud, reef pick for reef.
- Scope — the ratio of rode paid out to water depth — is at least 3:1, normally 5:1, and 7:1 in rough conditions.
- Lower the anchor, do not throw it. Set it by going gently astern. Take a bearing on two fixed objects so you know if it drags. Retrieve with the motor, not your back.
- Boats fitted with an electric winch: wash the anchor, chain and gypsy after every use; never use the winch to pull the boat up to the anchor in a swell — motor up to it.
Docking
Fenders and lines ready early. Approach into the wind or tide, whichever is stronger, at walking pace or slower. A plate aluminium boat is light for its size and responds quickly to wind and throttle — small inputs, early.
Weather
Watch it constantly. Afternoon sea breezes on the Queensland coast build quickly; a swell with a long period is more comfortable than a short chop of the same height. If the forecast deteriorates, head in early. Nobody has ever regretted being ashore in a blow.
Launching and retrieving
At the ramp
- Use the rigging lane, not the ramp, for preparation: bungs in, straps and tie-downs off (leave the winch strap and bow safety chain on), engine support removed, engine tilted, gear stowed, lines and fenders ready.
- Unplug the trailer lights before the trailer goes in the water. Hot bulbs and wet connectors do not mix.
- If you have towed a long way, let the hubs cool for fifteen to thirty minutes before submerging them. A hot hub drawn into cold water sucks water past the seals.
- Back down slowly and straight until the boat floats free or rolls off. Release the winch strap and bow chain only when the boat is over water and someone has a line on it.
- Start the engine and check the tell-tale before leaving the trailer.
Retrieving
- Trailer in only as deep as it needs to be; the boat should float onto the rollers or bunks and be winched up the last part, not driven onto the trailer at speed.
- Winch strap on, bow safety chain on, then drive out. Fit the stern tie-downs and engine support in the rigging lane, not on the ramp.
- Bungs out as soon as the boat is out of the water so it drains on the way home.
- Isolate the battery.
Trailer and towing
Sea Raider trailers are galvanised steel or aluminium, matched to the finished weight of the boat — hull, engine, fuel and gear — not the bare hull. Whichever you have, the trailer is the hardest-worked part of the package: submerged in salt water every trip, then towed at highway speed. It needs more attention than the boat.
Know your trailer’s numbers
The compliance plate on the drawbar gives three figures. Tare is the empty trailer. ATM (aggregate trailer mass) is the loaded trailer — boat, engine, full fuel, water, batteries, gear — measured at the coupling. GTM (gross trailer mass) is the loaded trailer’s weight through its tyres. The difference between ATM and GTM is the tow-ball mass, which should be roughly 8 to 10 per cent of the ATM and must not exceed your vehicle’s ball-load rating.
- Weigh the rig loaded, at a weighbridge, once. Dry hull weight plus an engine is not what you tow.
- Your tow vehicle’s rating, and its gross combination mass, are the limit — not the trailer’s.
- Do not carry extra gear in the boat on the road to save a trip. It all counts.
- Tow-ball height matters. The trailer must sit level behind the vehicle. A ball that is too low puts most of the weight on the front axle — the front bearings run hot and fail — and the rig will fish-tail above 80 km/h. Too high does the same in reverse. If your vehicle’s ball is the wrong height, fit an adjustable tow bar tongue.
Brakes and breakaway — the law
Under the national Vehicle Standards Bulletin VSB1: a trailer up to 750 kg GTM needs no brakes; over 750 kg GTM it needs brakes on at least one axle, which may be over-run (mechanical or hydraulic) up to 2,000 kg GTM; over 2,000 kg GTM it needs brakes on every wheel, controlled from the driver’s seat, and a breakaway system that applies and holds the brakes for at least fifteen minutes if the trailer comes off. Most boats from the 6.85 m up sit in that band. If yours has electric or electric-over-hydraulic brakes, the tow vehicle needs a brake controller and the breakaway battery must be kept charged.
Wheel bearings — a warranty condition
This is the part of the trailer we have seen fail most often, and it is the part that fails furthest from home.
Every launch pushes a warm hub into cold salt water. After a tow the air inside the hub is warm and expanded; the moment it is submerged it contracts, and that suction draws water and grit in past the seals. The longer and faster the tow, the warmer the hub and the harder it sucks. Salt water emulsifies the grease, hardens the seals, and rusts the rollers and races. A bearing running on contaminated or missing grease overheats, seizes, and can take the hub, the axle, the wheel and sometimes the boat with it — at highway speed.
As the owner you must:
- Keep every wheel bearing packed full of marine-grade wheel-bearing grease at all times, and top it up regularly. Do not wait for a service interval.
- Top up the grease after every saltwater launch, and before any long-distance tow. If your trailer has spring-loaded bearing protectors, pump grease in with a hand gun until the piston moves out and rocks under a fingertip — that is full. Never use a pneumatic grease gun; it blows the inner seal.
- Let the hubs cool for fifteen to thirty minutes after a long tow before the trailer goes in the water. Unhitch, rig the boat, check the gear — then launch.
- Flush the hubs, and the brakes, with fresh water after every saltwater use.
- On a long tow, feel each hub at every stop. A hub too hot to hold your hand on, or noticeably hotter than its opposite, is a bearing about to fail. Do not drive on.
- Have the bearings inspected at least every 90 days and repacked or replaced every six months by a qualified trailer mechanic, or sooner with frequent salt water use. If water is found inside a hub on disassembly, the bearings are replaced, not repacked.
- Carry spare bearings, seals and a race on any long trip.
- Never mix grease types.
Other warning signs: grinding or squealing, a wheel that wobbles or has play when jacked and rocked, grease on the inside of the wheel, milky grease at the cap, or a dust cap that has pushed off.
- Warranty condition: trailer wheel bearing or hub failure caused by lack of grease, and any damage to the trailer or the boat that results from it, is improper maintenance and is not covered. Wheel bearings, seals and brake linings are wear items — consumables, replaced at the owner’s cost as part of normal maintenance. Off-road use of the trailer is not covered.
Brakes
- Flush calipers, discs, drums and lines with fresh water after every retrieval, and let them dry.
- Grease the over-run coupling shaft every six months. Check cable tension on mechanical over-run systems with the boat loaded, and replace any cable showing corrosion or fraying.
- Hydraulic systems: flush the fluid every 12 to 24 months; pads to be replaced below 3 mm; confirm at each six-monthly check that the calipers are not seized.
- Electric brakes: keep the actuator unit out of the water and away from pressure washers; keep the breakaway battery charged and the lanyard clipped to the vehicle, not the safety chain.
- Engage the reverse lock on over-run couplings before backing up a ramp, and disengage it afterwards.
- Test the brakes at low speed before every tow.
Everything else on the trailer
- Safety chains crossed under the coupling, with rated D-shackles — no padlocks, no unrated hardware. Trailers over 2,500 kg ATM need two chains.
- Winch strap plus bow chain. The winch strap is not a restraint. A separate chain or cable from the bow eye to the winch post holds the boat if the strap fails. Stern tie-downs on every trip, with pads where they cross the hull. Do not over-tighten ratchet straps against a plate hull.
- Engine support bracket fitted for every road trip. The engine’s own tilt lock is not designed for corrugations.
- Rollers and skids. Spin every roller at each service and replace any that are cracked or seized. The hull should sit hard on the keel rollers with the side supports set firmly to it. No galvanised steel part of the trailer may touch the hull — steel against aluminium in salt spray is a galvanic cell. Carpeted bunks hold salt water against the hull; if bunks are carpeted, hose them and let them dry.
- Tyres at the pressure on the trailer plate, checked cold. Trailer tyres age faster than they wear — check the sidewalls and the date code. Carry a spare, a jack that fits under a loaded trailer, and a wheel brace. Check the wheel nuts before every trip and torque them to the trailer maker’s figure at each service, including the spare. Many trailers have anti-seize on the studs so the nuts do not corrode on; that also makes them easy to over-tighten, which stretches the studs — use a torque wrench, not a rattle gun.
- Winch and jockey wheel. Keep the winch cogs and the jockey wheel greased. If the jockey wheel becomes stiff to wind, strip it and re-grease the worm drive rather than forcing it.
- Lights and plug. Six-monthly inspection of lenses, wiring and function; dielectric grease on the plug contacts; unplug before the trailer goes in the water.
- Galvanised frame. Wash after every trip and store dry. White powder at drainage points is normal zinc ageing. Keep the frame drain holes clear so salt water is not trapped inside the sections; spray the insides with lanolin or fish oil annually; touch up any damaged galvanising promptly with a zinc-rich cold-gal paint.
- Aluminium frame. No rust, but galvanic attack around stainless bolts and steel fittings. Rinse the same way and check fastener points for white corrosion.
- Sale or transfer of a Queensland trailer over 750 kg ATM requires a current safety certificate.
Pre-tow check
Coupling latched, pinned and correctly seated on the ball. Safety chains crossed and shackled. Winch strap tight and bow chain on. Stern tie-downs on. Engine support fitted, engine tilted. Jockey wheel up and locked. Bungs out for the trip home, in for the trip out. Hatches latched, canopy down, loose gear out. Lights plugged in and working. Tyres at pressure. Hubs greased. Brakes tested at low speed. Mirrors adjusted.
After every trip
This is the chapter that decides how long your boat lasts. Do it the same day, before the salt dries.
The wash-down — a warranty condition
- Flush the engine first (see Engine).
- Hose the whole boat with fresh water, top to bottom, inside and out — hull, transom, under the gunwales, inside the side pockets, the anchor well, under the seats, the bilge, and around every fitting. Salt hides in seams, under brackets and behind fittings, and dried salt crystals are what start corrosion.
- Wash with a mild, pH-neutral marine wash or dish soap and a soft brush or sponge. Rinsing alone leaves a salt film on the metal.
- Rinse again, and wipe dry with a chamois or microfibre. Water left to dry leaves salt and minerals behind.
- Hose the trailer: frame, inside the sections through the drain holes, hubs, brakes, rollers, winch, lights.
- Bungs out, bow up on the trailer, so the bilge and keel drain. Leave the boat like that between trips.
- Empty the bilge of anything metal — sinkers, hooks, coins, bottle tops. A single lead sinker sitting in a wet bilge will pit an aluminium hull.
- Battery isolator off.
- Wet gear out. Wet carpet, ropes, towels and covers lying on aluminium hold water against it and cause poultice corrosion.
- Warranty condition: damage from failure to flush, clean or protect the vessel after saltwater use is excluded from warranty.
CAUTION — What never goes near an aluminium boat: acids (including “hull brighteners” and oxalic or phosphoric acid cleaners), alkalis, bleach, chlorine, ammonia, household cleaners, petrol, thinners, acetone, methylated spirits or any solvent. They strip the oxide film that protects the aluminium, etch the metal and dissolve EVA decking. If a cleaner is not labelled safe for aluminium and marine use, do not use it. Never put the boat in a chlorinated or salt pool.
Caring for the hull and finish
How aluminium corrodes, and how to stop it
5083 plate aluminium does not rust and resists salt water without any coating. What it does not tolerate is being made part of an electrical circuit with a more noble metal in salt water. Three things cause almost every case of corrosion we see:
- Dissimilar metals. Copper, bronze and brass are incompatible with an aluminium hull — no brass hose tails, no bronze through-hulls, no copper anything. Stainless steel is tolerable only when isolated from the aluminium with a plastic washer or pad and bedded in a marine sealant over the whole contact face, with a thread compound such as Tef-Gel on the fastener. Lead sinkers, hooks, coins and bottle tops in the bilge are dissimilar metals too. Wet carpet against aluminium is nearly as bad.
- Stray current. A leak from the boat’s own wiring into bilge water, a faulty charger, or shore power at a marina. See Electrical system. Stray current works in days, not months.
- Trapped water. Salt water held in a seam, under a fitting, under a carpet or against a fuel tank without air produces crevice and poultice corrosion — white powder when dry, white paste when wet. Drainage and drying prevent it.
The signs: white or grey powdery deposits; pitting; discolouration or blistering paint around fittings, bolts and welds. If you see them, photograph them and call us. Do not paint over corrosion.
- Warranty condition: corrosion or electrolysis caused by inadequate anode protection or incorrect electrical installation by third parties is excluded from warranty, as are alterations, drilling, penetrations or electrical work carried out by others.
Sacrificial anodes
Anodes are lumps of a more active metal bolted to the hull and the engine so that they corrode instead of the boat. They are consumables.
- Use aluminium-alloy anodes on the hull and transom. They work in salt and brackish water, keep working when the boat is trailered and dry, and last longer than zinc. Zinc stops working in fresh or brackish water; magnesium is for fresh water only and dissolves in weeks in salt. Never mix anode alloys — when mixed, only the most active one does any work.
- Inspect monthly. Replace at half worn. Replace annually regardless: they are cheap insurance. An anode that is not wearing at all is not connected properly and is not protecting anything.
- Never paint or cover an anode. Scrub growth off so it stays in contact with the water.
- On a trailered boat, anodes wear slowly. Rapid wastage is a warning: something on the boat — a new fitting, a wiring fault, a charger — is causing a current.
- Trim tabs carry their own anodes; the engine carries its own — see Engine.
- Warranty condition (boats kept afloat): the Terms and Conditions require anodes appropriate to the water type, inspected at least every three months, replaced before half consumed, and records kept to be produced with any corrosion claim.
Antifouling — read this before anyone paints your hull
- A trailered boat does not need antifouling. Leave the hull as delivered and wash it after use. Antifoul adds drag, wears away and is a maintenance liability you do not need.
- If the boat is ever moored, only an antifouling system approved for aluminium may be used — a copper-free formulation over an etch or epoxy barrier primer specified for aluminium, applied strictly to the paint maker’s instructions. Ask us first: the factory paint system must be checked for compatibility.
- Copper-based antifouling on an aluminium hull sets up a galvanic cell that turns the hull into white powder. Red-lead and red-oxide primers do the same. The engine leg must never see copper paint either.
- Warranty condition: copper-based antifouling on the hull voids the hull and paint warranty.
Paint and powder coat
- Two-tone paint is standard and is warranted for twelve months against defects. Oxidation, fading and cosmetic deterioration from environmental exposure — salt, sun, fuel, dissimilar metals — are excluded, as they are by every builder. UV is the enemy: cover the boat when it is stored.
- Wash as above; apply an aluminium-safe wax or protectant once or twice a year; never let soap dry on the paint.
- Chips matter. A stone chip or a bait-knife scratch through the paint, especially at the waterline, at the chines or around fittings, lets water under the coating. The paint lifts and the aluminium beneath oxidises. Touch up chips promptly: sand out any bubbled paint and white oxide, feather the edges, clean, mask, etch primer, then top coat. Ask us for the paint codes for your boat. Never use petrol or thinners to remove tar or glue.
- Vinyl wraps are a separate product with their own care: no pressure washing at the edges, no solvents, and a wrap-safe wash. A wrap typically lasts five to ten years.
Welds, fittings and the structure
The hull and its welds are the part of the boat we warrant for five years. Look them over at every wash: any crack, any weeping, any fastener that has loosened, any fitting that moves. Report it. Do not weld, drill or cut anything on the hull yourself: see Modifications.
Deck and fit-out
EVA decking (SeaDek and equivalent)
- Rinse after every trip; wash weekly in season with mild soap and a soft brush along the grooves.
- Sunscreen yellows light-coloured EVA — wash it off the same day. Fish blood: cold water and soap promptly; an enzyme cleaner if it has set. Fuel or oil: wipe up immediately.
- Never solvents, petrol, acetone, methylated spirits, bleach, ammonia, scourers, steel wool, silicone dressings — or a pressure washer, which forces water under the adhesive.
- Cover when stored; EVA handles UV but fades.
Stainless steel
- Sea Raider fits 316 stainless. Within a few kilometres of the surf it will still develop brown “tea staining” — cosmetic, not structural. Wash the stainless every time you wash the windows; clean tea staining with mild detergent or a citric-acid stainless cleaner, keeping any acid off the aluminium and galvanising.
- Never hydrochloric or sulphuric acid, never steel wool, never abrasive pads.
Windows, windscreen and clears
- Fresh water and a clean microfibre only on acrylic windscreens and PVC clears. No abrasives, no dry wiping of grit, no solvents. A plastic polish and conditioner keeps clears soft.
- Roll clears; never fold them.
Canvas, canopies and covers
- Brush off dirt; wash with mild natural soap in lukewarm water, rinse, and dry completely before stowing. No detergents, no pressure washer. Re-proof with a fabric guard when water stops beading.
- Storage covers must be breathable and must not pool water or rub on the paint.
Hatches, seals and hardware
- Rinse hatch tracks and gutters; keep their drains clear.
- Check rubber seals for cracking and flattening; lubricate hinges, latches and the sliding window with a silicone or lanolin spray.
- Rod holders, rails, ladders, cleats: rinse, and check the bases for movement.
Live-bait tank and deck wash
- Flush the pump and lines with fresh water after every use, clean the strainer and pick-up, and check the tank drain and overflow are clear. Do not spray penetrating oil into a pump.
- Check the impeller monthly in season; replace aerator stones when the flow drops.
Self-draining deck and scuppers
The deck drains itself only if the scuppers are clear. Check them at every wash for leaves, bait, line and growth, and make sure the no-return flaps seal and swing freely. A blocked scupper in heavy rain fills the cockpit.
Storage and lay-up
Between trips: washed, dry, bungs out, bow up, isolator off, covered with a breathable cover, in the shade if you can.
If the boat will sit for a month or more:
- Fill the fuel tank, add a stabiliser and run the engine for ten minutes to get it through the system.
- Change the engine oil and filter and the gear oil before storage, not after — used oil holds acids and water. Fog the cylinders only if your engine manual calls for it.
- Store the engine vertical so the cooling passages drain. Grease every point, spray with corrosion inhibitor, cover with a breathable engine cover.
- Batteries out or isolated, terminals cleaned, on a maintenance charger.
- Deck, canvas and clears clean and dry. Cushions, ropes, life jackets and electronics off the boat where they cannot mould.
- Live-bait tank and lines drained and dry. Anchor and chain rinsed.
- Trailer: repack the bearings before a long storage, tyres to pressure, and take the weight off the tyres if it is months.
- Do not leave the boat in the water. If you must, see Antifouling and Anodes, and check it weekly.
Recommissioning
Check the fuel for separation (drain it if it has been unstabilised for more than six months). Check the gear oil for milkiness. Watch the tell-tale on first start. Inspect the anodes, the bearings, the brakes and the lights. Check every safety-gear date. Flood-test the bilge pump. Load-test the batteries. Then do the pre-departure check.
Maintenance schedule
The engine manual governs engine items; this table is the boat and trailer, with the engine intervals shown for reference. Keep receipts and a log — the service record at the end of this manual is there for that.
| When | Boat and finish | Engine (per engine manual) | Electrical and fuel | Deck and fit-out | Trailer |
|---|---|---|---|---|---|
| Before every trip | Bungs in; look over hull and fittings | Tell-tale, oil, prop nut and pin, primer bulb, kill-cord; water-separator bowl | Isolator on; batteries charged; float switch lift test; nav lights | Scuppers clear; hatches latched; safety gear in date and briefed | Pre-tow check; hubs greased; brakes tested; unplug lights before dunking |
| After every trip | Full fresh-water wash inside and out, wipe dry; bungs out, bow up; bilge cleared of metal | Flush; engine vertical; corrosion spray; check prop for line | Isolator off | Rinse EVA, canvas, clears, anchor, winch; flush bait tank | Flush frame, hubs, brakes; feel hubs at stops |
| Monthly | Inspect hull and trim-tab anodes; inspect paint at waterline, chines and fittings; touch up chips | Inspect leg anodes; trim and tilt operation and fluid | Terminals clean and tight | Brush canvas; EVA edges; bait-pump impeller in season | Brake pads and corrosion; grease nipples; strap condition |
| Every 3 months | Bilge and underfloor inspection for water and debris; drains clear | First service at 20 h or 3 months on a new engine | Bilge pump flood test; filler cap seal and breather | Wash stainless; lubricate hinges and latches | Bearings inspected; tyre wear; lights and wiring |
| Every 6 months | Wax or protectant on paint | Mid-interval checks with heavy salt use | Wiring and terminals for green or black corrosion; fuse holders | Re-proof canvas; polish clears | Bearings repacked or replaced; coupling greased; suspension and U-bolts; brake pads over 3 mm; galvanising touched up |
| Every 100 h or 12 months | Replace anodes; full underfloor and tank inspection; sealed-chamber plugs; professional inspection of welds and fittings; re-bed any weeping fitting | Full 100 h / annual service: oil and filter, gear oil, plugs, thermostat, impeller, fuel filters and separator element, anodes, grease, torque | Battery load test; charger; accessory wiring to marine standard | Anchor winch stripped, cleaned and greased; chain; hatch seals; rod-holder bases | Brake fluid flush (12–24 months); tyres rotated; wheel nuts torqued; full frame, drain-hole and roller check; safety certificate if required |
| Every 300 h or 3 years | — | Water pump, fuel pump, belts, deeper checks per manual | Fuel tank internal inspection | — | Brake overhaul |
- Warranty condition: the boat must be maintained in accordance with this manual and accepted marine practice, and serviced every 100 hours or 12 months, whichever comes first.
Troubleshooting
| Symptom | Check | Then |
|---|---|---|
| Engine will not start | Kill-cord clipped in; isolator on; battery voltage; in neutral; fuel primed | Engine manual; dealer |
| Weak or no tell-tale | Blocked inlet or tell-tale outlet — clear with a wire while cool | Do not run it; impeller or thermostat — dealer |
| Engine overheats | Tell-tale; salt build-up; thermostat | Stop; dealer |
| Bilge pump not running | Fuse; float switch stuck; debris | Manual override at helm; clear and test |
| Boat lists at rest | Load distribution; water in a compartment | Redistribute; if water — investigate before use |
| Boat sits low or feels heavy | Water in bilge or a chamber | Call us |
| Steering stiff or with play | Hydraulic fluid level; leaks at helm or cylinder | Do not use until inspected |
| Trailer brakes weak or grabbing | Cable tension; fluid; corrosion; reverse lock engaged | Trailer mechanic |
| Hub hot, grinding or wobbling | Bearing failure | Stop. Do not continue. |
| Trailer lights out | Plug corrosion; earth; bulb | Clean with dielectric grease; replace |
| White powder or blistered paint on the hull | Corrosion — dissimilar metal, stray current or trapped water | Photograph; call us |
If something on the boat fails, stop using it. Continued use of a defective component can turn a small warranty repair into a large excluded one.
Modifications and accessories
Fitting things to your boat is normal — electronics, lights, a winch, a fridge, rod holders, a bait board, a trolling motor. Doing it wrongly is the most common way owners void their own warranty without realising.
- Ask us in writing first. The Terms and Conditions require Sea Raider’s prior written approval for modifications or additions after purchase. A quick email with what you want and who is fitting it is enough. We will tell you if it affects the plate, the structure or the wiring.
- Nothing through the hull, floor or a sealed chamber without a sealed, isolated fitting. Every unsealed screw hole is a water path into the foam.
- No welding, cutting or drilling of the structure by anyone other than Sea Raider or a fabricator we have approved.
- Electrical additions to marine standard, fused, sealed, isolated — see Electrical system.
- Weight counts against the plate. A trolling motor and its batteries, a fridge, a tower, a second battery bank: all of it comes out of your maximum load, and a heavier engine than the plate allows is never permitted.
- Keep the invoice for any third-party work. Under the Terms and Conditions the person who does the work is responsible for damage it causes.
Commercial use
Your boat is supplied as a recreational vessel. If it is used to earn money — charter, hire and drive, commercial fishing, paid work of any kind — it becomes a Domestic Commercial Vessel under Australia’s national law, regulated by AMSA. That brings survey, certificates of operation, safety management systems and crew qualifications, and it changes the warranty: vessels purchased for commercial use carry a six-month warranty, not five years.
A boat built as a recreational vessel cannot simply be put into survey later. If there is any chance the boat will be worked, tell us at order. Our boat survey page explains the options, including the exemptions that may apply to an existing boat.
Your warranty and how to claim
The full warranty is published at www.searaider.com.au/warranty and is incorporated into your Terms and Conditions of Sale. That page is the authoritative text. In summary:
- Structural hull — five years from the date of original retail purchase (orders after June 2025): the hull and sealed chambers, all welding performed by Sea Raider, stringers, transom and components welded integrally into the hull, and topside components fabricated by Sea Raider.
- Paint and powder coat — twelve months, excluding normal wear, environmental oxidation and fading, and cosmetic deterioration.
- Commercial use — six months, covering the same components.
- Bought-in equipment — engine, electronics, trailer, canvas, batteries and accessories — is covered by its own manufacturer’s warranty, on their terms. Register those warranties with the manufacturer.
- The warranty is transferable to a subsequent owner for the balance of the original period; the start date does not change.
What is excluded, in full on the warranty page, comes down to: components not made or installed by Sea Raider; misuse, negligence, accident, racing, overloading, or failure to follow this manual; improper maintenance, including failure to flush, clean or protect the boat after saltwater use; unapproved modifications; normal wear on upholstery, windows, windscreens, seals and consumables; damage from trailers not supplied or approved by Sea Raider, or from improper trailer support or adjustment; corrosion or electrolysis from inadequate anode protection or third-party electrical work; and trailer wheel bearing or hub failure where the bearings have not been kept full of grease.
To make a claim
- Stop using the boat or the affected component as soon as you find the defect. Continued use that causes further damage is not covered.
- Tell us, or an authorised Sea Raider dealer, in writing — email is fine — with your proof of purchase, your service history, and photographs.
- Deliver the boat or the component to the dealer, at your expense unless the Australian Consumer Law provides otherwise.
- The dealer assesses the claim with Sea Raider and arranges repair or replacement by qualified marine technicians using approved parts and methods.
Your rights under the Australian Consumer Law
This warranty is given by Sea Raider Pty Ltd, ABN 45 683 471 963, of Redlands Coast Marina, Queensland, Australia; telephone 07 3477 9338; email [email protected]. It is in addition to any rights and remedies you have under the Australian Consumer Law, and nothing in this manual or in the warranty excludes, restricts or modifies those rights.
Our goods come with guarantees that cannot be excluded under the Australian Consumer Law. You are entitled to a replacement or refund for a major failure and compensation for any other reasonably foreseeable loss or damage. You are also entitled to have the goods repaired or replaced if the goods fail to be of acceptable quality and the failure does not amount to a major failure.
Specifications by model
Figures as published at www.searaider.com.au in September 2026. Your Australian Builders Plate is the authority for your boat’s persons, load and power limits; where the plate and this table differ, the plate governs. Dimensions and weights are nominal and vary with the options fitted.
| Model | Hull | Length overall / hull (m) | Beam (m) | Plate: bottom / topsides / transom (mm) | Power (hp) | Fuel (L) | Max persons | Dry weight (kg) |
|---|---|---|---|---|---|---|---|---|
| 6.25m Centre Console | Mono | 6.25 / 6.00 | 2.20 | 6 / 4 / 5 | 115–175 single | 170 | 5 | 900 |
| 6.25m Pro Fisher | Mono | 6.25 / 6.00 | 2.20 | 6 / 4 / 5 | 150–200 single | 170 | 5 | 1,000 |
| 6.25m BowRider | Mono | 6.25 / 6.00 | 2.20 | 6 / 4 / 5 | 115–200 single | 175 | see plate | — |
| 6.25m SportsCab | Mono | 6.25 / 6.00 | 2.20 | 6 / 4 / 5 | 115–200 single | 175 | see plate | — |
| 6.85m Centre Console | Mono | 7.20 / 6.85 | 2.45 | 6 / 5 / 6 | 200–300 single | 300 | 6 | 1,500 |
| 6.85m Walk Around | Mono | 7.20 / 6.85 | 2.45 | 6 / 5 / 6 | 200–300 single | 300 | 6 | 1,400 |
| 6.85m Pro Fisher | Mono | 7.20 / 6.85 | 2.45 | 6 / 5 / 6 | 200–300 single | 350 | 6 | 1,500 |
| 7.5m Centre Console | Mono | 7.90 / 7.50 | 2.45 | 6 / 5 / 6 | 200–350 single or twin | 345 | see plate | — |
| 7.5m Pro Fisher | Mono | 7.90 / 7.50 | 2.45 | 6 / 5 / 6 | 250–350 single or twin | 350 | 8 | 1,700 |
| 7.5m SportsCab | Mono | 7.90 / 7.50 | 2.45 | 6 / 5 / 6 | 250–350 single or twin | 350 | 8 | 1,700 |
| Boss 770 | Mono, wide beam | 8.00 / 7.20 | 2.65 | 6 / 5 / 6, 12 mm keel bar | 300–400 single or twin | 478 | 8 | 2,100 |
| Boss 880 | Mono, wide beam | 7.90 / 7.50 | 2.65 | 6 / 5 / 6 | 350–400 single or twin | 478 | 9 | 2,000 |
| 7.9m Shark Cat | Cat | 9.10 / 7.90 | 2.45 | 6 / 5 / 6 | 300–400 twin | 380 | 8 | 2,500 |
| 8.8m Shark Cat | Cat | 10.00 / 8.80 | 2.80 | 6 / 5 / 6 | 400–500 twin | 480 | 9 | 3,500 |
| 9.6m Pro Fisher | Mono | — / 9.60 | 3.00 | 6 / 5 / 8 | 400–600 single or twin | 900 | 10 | 3,200 |
| 10m Shark Cat | Cat | 11.00 / 10.00 | 3.50 | 6 / 5 / 6 | 600–800 twin | 1,000 | 12 | 4,900 |
All hulls: 5083 marine-grade plate; welded internal frame with 6 mm stringers and 5 mm ribs; foam filled and sealed water tight; double chine; self-draining deck with no-return scuppers and separate underfloor bilge pump; fully welded plate floor; two-tone paint. Dry weights are hull only, without engine, fuel or trailer.
Service record
Have your dealer or mechanic stamp or sign each service, and keep the invoice with this page. Your first service at 20 hours or three months, and every 100 hours or 12 months after that, is a condition of the warranty.
Pre-delivery inspection — date, dealer, hours: ________________________________________
20 hour / 3 month service — date, hours, by: ________________________________________
100 hour / 12 month service — date, hours, by: ________________________________________
200 hour / 24 month service — date, hours, by: ________________________________________
300 hour / 36 month service — date, hours, by: ________________________________________
400 hour / 48 month service — date, hours, by: ________________________________________
500 hour / 60 month service — date, hours, by: ________________________________________
Trailer bearing service — date, by (repeat every six months): ________________________________________
Trailer bearing service — date, by: ________________________________________
Trailer bearing service — date, by: ________________________________________
Trailer bearing service — date, by: ________________________________________
Anode replacement — date: ________________________________________
Anode replacement — date: ________________________________________
Glossary
- ATM / GTM / Tare — loaded trailer mass at the coupling / through the tyres / empty trailer.
- ABP — Australian Builders Plate: the capacity plate on your boat.
- Anode — a sacrificial block of active metal that corrodes instead of the hull.
- Bar — a sandbank at a river or creek mouth where waves break; designated bars have lifejacket rules.
- Bilge — the lowest inside part of the hull where water collects.
- Bung — the drain plug in the transom.
- Chine — the edge where the hull bottom meets the side.
- EPIRB — emergency position-indicating radio beacon.
- Freeboard — the height of the side of the boat above the water.
- Gunwale — the top edge of the hull side.
- HIN — Hull Identification Number.
- Scupper — a deck drain that lets water out but not in.
- Scope — the ratio of anchor rode let out to the depth of water.
- Tell-tale — the stream of water from the engine showing the cooling system is working.
- Transom — the flat stern of the boat the engine mounts to.
- Trim — the fore-and-aft attitude of the boat, adjusted by engine tilt and trim tabs.
This manual is general guidance for the operation and care of Sea Raider boats. It does not replace the owner’s manual for your engine, trailer, electronics or other equipment, which govern those items. Safety-equipment, licensing and towing requirements are those of Queensland as at September 2026 and change over time — confirm them with Maritime Safety Queensland, the Department of Transport and Main Roads, or the authority in your state before you go. The warranty text at www.searaider.com.au/warranty and the Standard Terms and Conditions of Sale prevail over anything in this manual. Version 1.1, issued September 2026. Sea Raider Pty Ltd ABN 45 683 471 963.